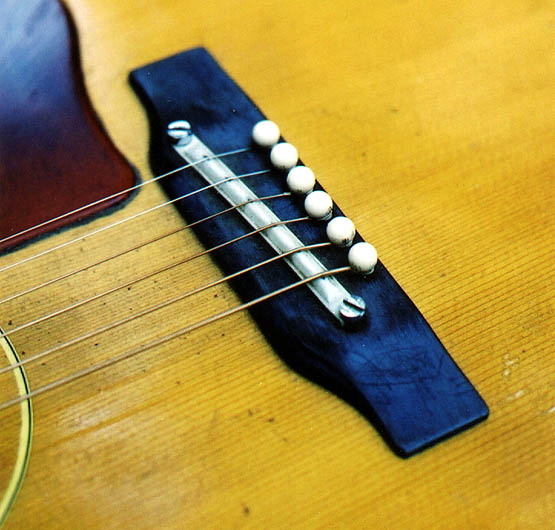
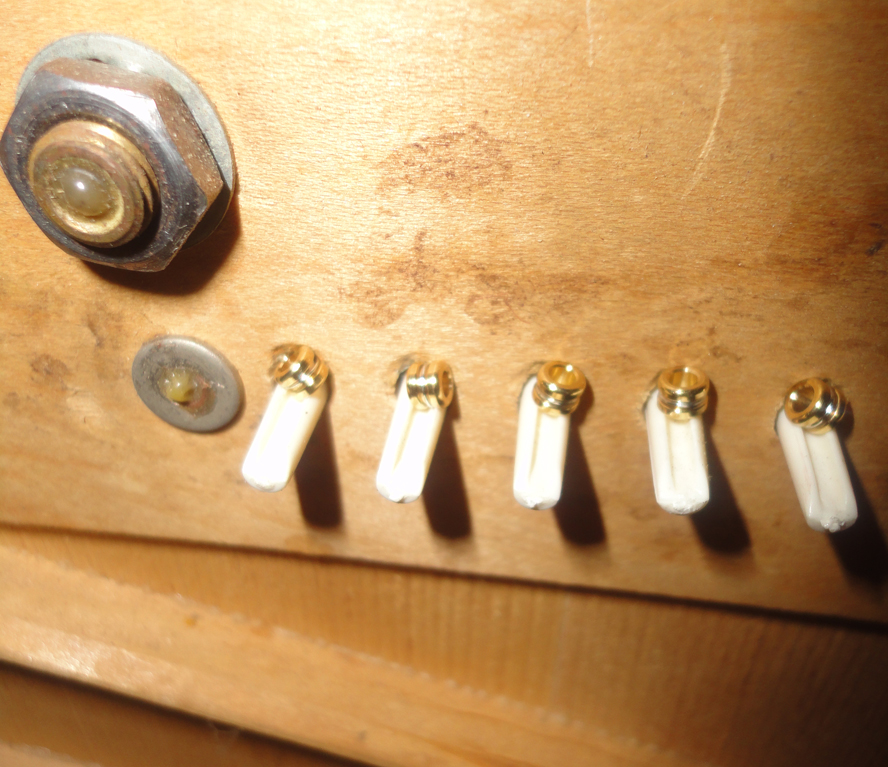
Martha had this classic Sixties Gibson B-25, with the plastic bridge and the porcelain saddle. She liked the size, and the small neck of that period was also good for her. We've all seen these guitars—they were deployed on many of Gibson's (and Epiphone's) flattop models—but we've often had a hard time hearing them. To put it diplomatically, this bridge was not Gibson's finest moment.
Note to everyone, right now:
Alas, I am so slammed with work I can't consider doing this job. My fond hope, in putting this page up, is that other people can glean enough info to take it on themselves. Which means, in most cases, journeyman luthiers who have the tools and basic skills.
There are bridges that are commercially available that are supposed to be replacements for the original Gibson bridges, and in most cases, they really don't work. Over the years, Gibson had several variations on their bridges (wood and plastic) that had those adjustable implants, and there's no single thing on the market that really fits. In fact, almost every one I have seen has had a woefully incorrect angle to the saddle (copying Martins) which assures that the intonation will be incorrect on all but perhaps one string. In other cases, it will be wrong on every string. You have to base the replacement bridge on the original, assuming it worked. Which, in most cases, it usually did reasonably well. That's why I have gone to the trouble of showing how to make the new bridge to fit the guitar in question based on the original, even with its straight-line points of contact. The adjustable bridge was absolutely one of Gibson's dumbest ideas.
If I could clone myself, I would assign my clone the task of tooling up to make a selection of replacement wooden bridges with bone saddles that folks could obtain and drop into these old Gibsons. They sound so much better! But that would entail making a selection of a dozen or so possible bridges. Even if I had them to sell, I'd be spending many hours a week helping people determine which one they needed. Not exactly a get-rich scheme, is it?
If you can find a local (and willing) luthier who has the tools and sufficient skills to look at my page and follow the process, you'll have a much more satisfying guitar to play. I wish I was the guy to take that on for you. I get this inquiry several times a week!
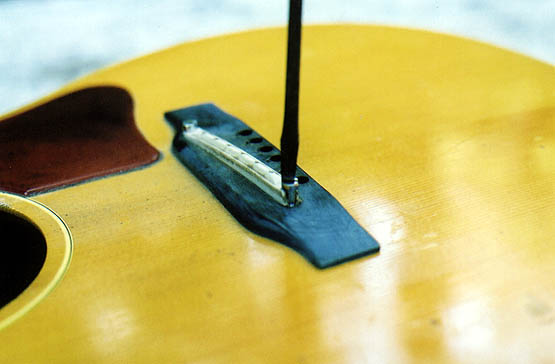
So, the first thing to do—before taking the old bridge off—is to check the intonation as it is. If the high E is spot on, which is usually the case, you have a reference for where to put the new saddle in the wood bridge. We'll go into that on page two here.
Once that's sorted out, it's time to get rid of the old one.
Start with the saddle. Out it comes. Good riddance.
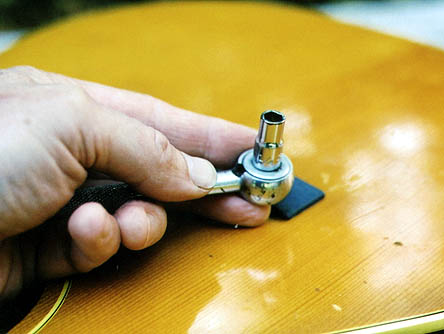
Next, you take a little
socket like this and remove the four screws inside that hold
down the bridge itself.
Now you have this. See,
it's hollow inside, and pure polystyrene! What a plus for tone, eh?

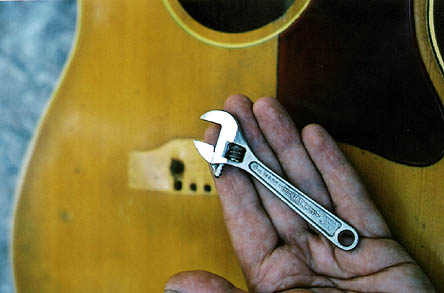
Next you take a little
adjustable wrench like this and quickly loosen the
nuts on
the inside that hold the lugs in place. They'll spin
off with your fingertips.
Lugs are in the upper right of this photo:
Then you put the adjusting bolt back in the lug for a moment, and use a pair of end nippers and a block of soft wood to lever the studs carefully out of the face.

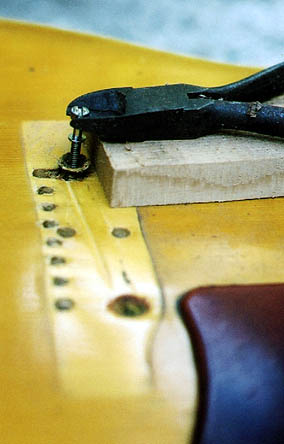
Easy does it...out they come.
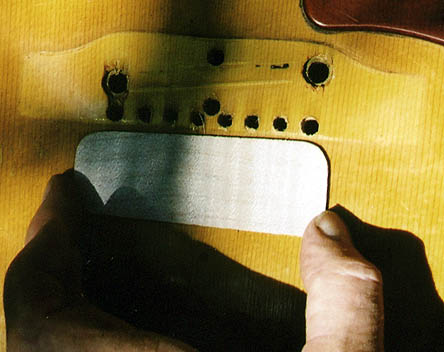
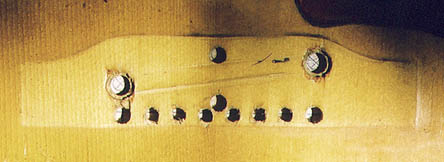
Now you have this little mess:
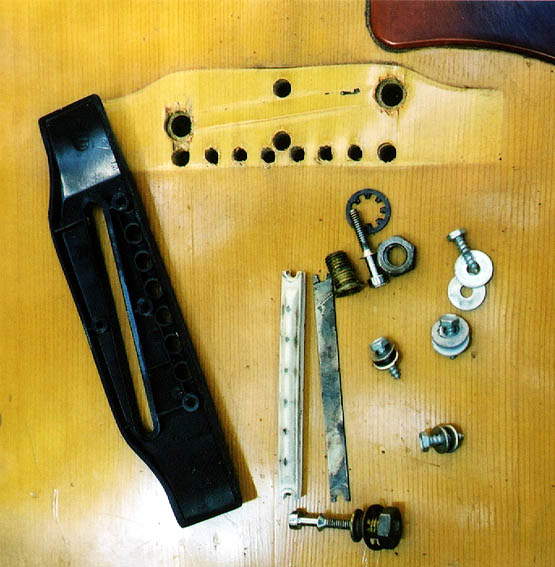
A lot of weight. And a lot of holes that need to be filled before you can go much further.
It still has lacquer where the bridge was - the difference in color is a suntan line.
Step One is to cover all the holes on the inside.
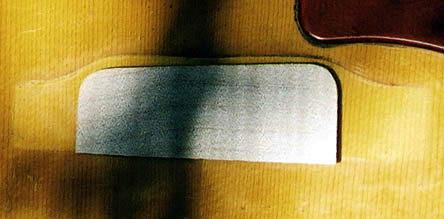
Sorry for the shadow
here, but what I have is a thin maple patch big
enough
to cover all the holes. The guitar had an adequate
bridgeplate already.
Since the new bridgepin
holes will precisely line up with the old ones, they
needn't be
filled, but they do need to be covered.
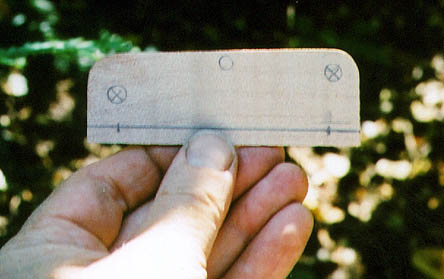
To glue this patch in properly, you need to make precise marks on the bridgeplate patch that you can see from outside through the holes.
Always doing a dry run makes sure you have it right when you actually glue it.
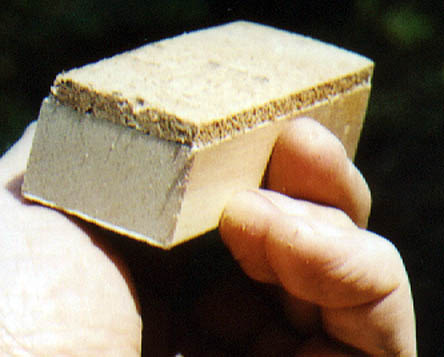
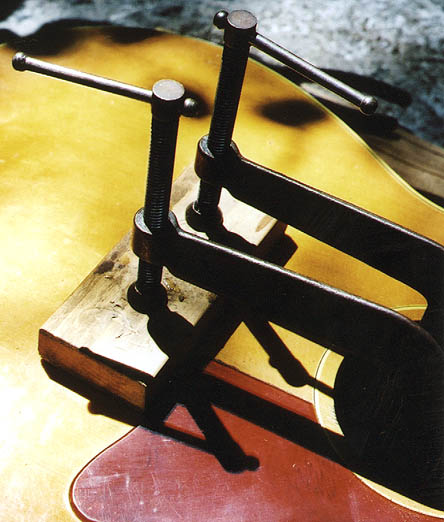
Since the top is old and a bit bulged, this patch will need to go down with a cork-faced caul. They sell this stuff at hardware stores for covering bulletin boards.
Here's the bridgeplate patch double-stick taped to the caul which is in turn taped to a big C-clamp. It's attached off-center for a reason. Note that the marks are nice and prominent, so they are visible through the holes in the top.
Note:
if you were doing a bridgeplate patch on a more
normal guitar, you'd
use one that was only big enough to cover the bridgepin
holes. The point of this larger patch is to maintain
a broad even inside surface to support good clamping
and gluing.
Note also the rear long line with the two crossmarks for
locating it to the two outside bridgepin holes; the patch would
need to be just big enough to cover that area, keeping in mind where the
string balls need the real support.
You apply the glue after you do a dry run, right? Right.
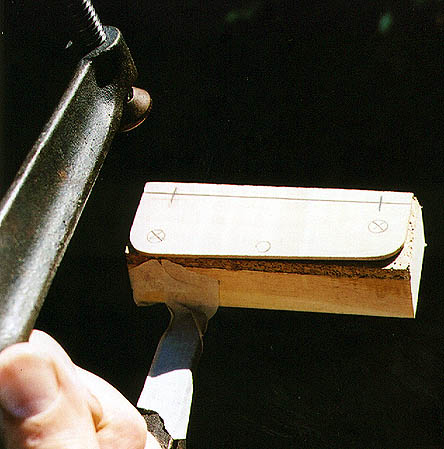
Now put the above rig in through the hole until the marks (see them?) line up with the holes, like this:
The caul is thick, not just for strength, but because you want to make sure it's going in without the clamps hitting braces or anything else.
Use a mirror and a light to check inside.
Then you clamp it like this:
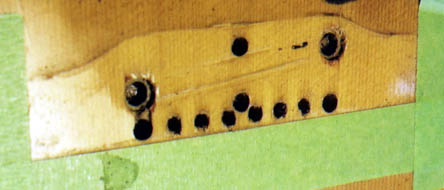
Now we have this. As
mentioned, it still has lacquer on it, and lots of
holes. But at least the holes have clean, closed
bottoms.
At this point, I use the masking tape to define the precise edge of the backside and ends of the bridge, for later reference.
As mentioned, you have to fill the holes. I use spruce dowel (ex-violin soundpost) for the eight smaller ones, and two layers of spruce - some larger dowel and then a hand-cut disc - to fill each of the lug holes. A bit of spruce gets laid into any chipped-up places too. You want this, in the end, to be a smooth surface.
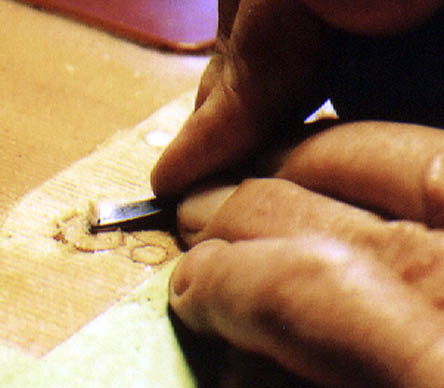
Here's another look at it.
Questions? Drop me a line: click here
To the rest of the site:
Paul
Hostetter, luthier
Back to the main
page