
I'd venture to say that 99% of gear replacements happen unnecessarily. Players perceive a problem—they're worn, stiff, won't hold tune, they exhibit slop, there's a lag, whatever—and decide that replacing them will solve the problem. But the problems are in fact almost always (in order of importance or likelihood):
1) a matter of needed maintenance and adjustment, or
2) an issue with the instrument that has nothing at all to do with the gears, or
3) plate and post positioning and alignment
The fundamental issue, in any event, is friction somewhere that is causing the problems.
Your task is to identify the point of friction, and take care of it.
In case #2, where there are no structural problems with the tuners themselves, the difficulties arise because either a) the points of friction at the nut and bridge need attention, (see below or just click here).
In case #3, I have a separate page about that, too.
Boy, do I wish I could get all those discarded tuners back, for they're usually way better than the replacements people put on instead. Eighty years and counting, those old Gibson (or Vega or Martin or whatever) gears have a long way to go yet, if only the players would get with the program. But so many people would rather just spend money on some fashionable consumer item that's being advertised. Blah blah. Rant over.
By the bye, I do see tuners poop out completely: cracked cogs, slipping gears because teeth are worn down or tolerances were lost - all due in some measure to poor maintenance, though most such problems arise in cheap or shoddily made gears.
And there used to be these really low-end American machines made entirely of steel that never seem to work in right, no matter what you do. They look like this:
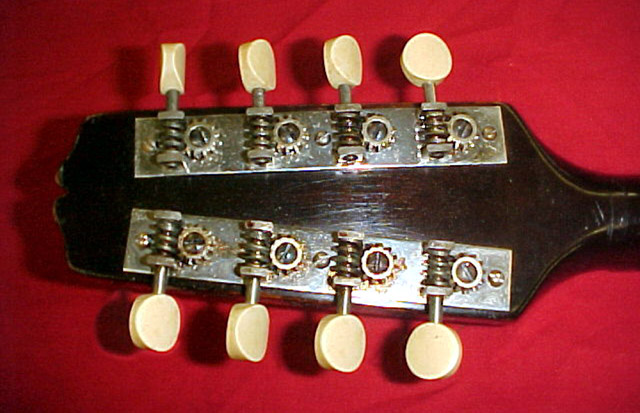
Yes, this is a snakehead Gibson A-Jr, which is where I seem to see these gears rather often. Steel plates, cogs and worms: they are really difficult. It's worth trying the procedures below, but they may only be partially effective.
However the more common old Waverlys, even when visibly worn, continue to work great because they were very well made in the first place, and that bit of brass in the cogs and the plates really seems to help. Terminal problems with them are very rare.
Again, the discussion of friction at nuts and saddles can be pursued by clicking here.
Let's look at making the gears themselves work right. Later on we'll look at post alignment and related points of friction.
Fortunately, if all else fails, Stew-Mac has some very high-grade tuners available now that have a vintage appearance that fit most of the old American mandolins. There are other fine machines made—Alessi, Rubner, Gotoh, et al.
So after making certain the problem isn't with the slots in the nut or bridge, let's assume the worst about just the gears and look at the stuff you might have to do to get those old Waverlys, or Gotohs, or whatever you have, working like they should have when they were new.
Let's first talk about slop. Slop (sometimes incorrectly called backlash) is not a bad thing. However, when there’s friction that prevents string tension from taking up the slop, that’s when you have trouble. It should go without saying, but I'll say it anyway: always tune UP to a note. If your string is sharp, tune below the desired note and carefully tune up to it. The string tension should easily take up that slop, and you'll stay in tune.
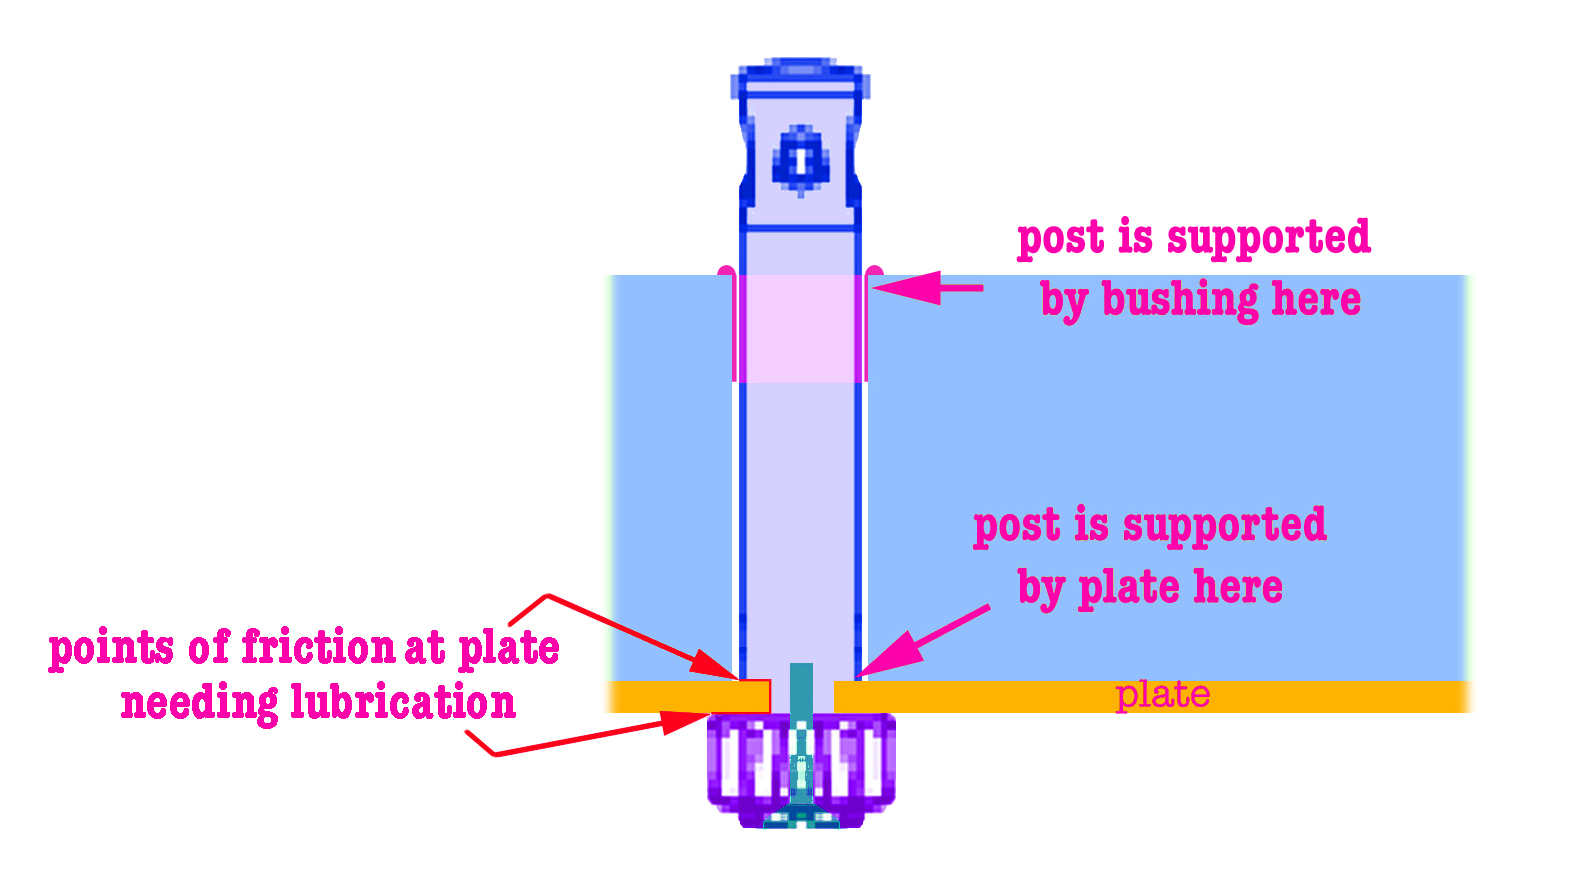
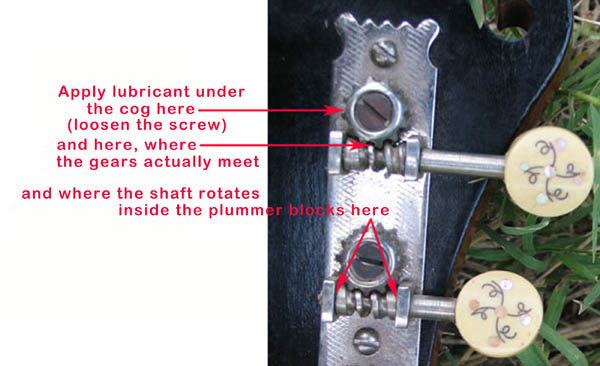
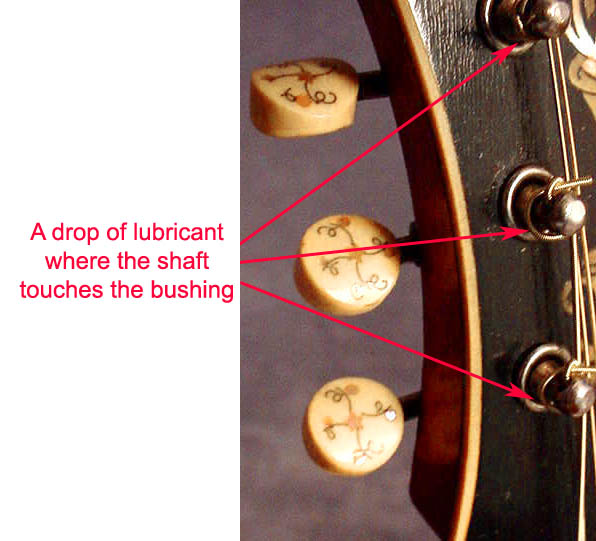
So the proper focus is to figure out where and why things are hanging up—if the problem isn’t actually the nut slots grabbing the strings—and that's usually friction on the posts. This can be because the holes through the headstock are too tight, addressed here, or they're misaligned with the tuners, or the bushings on the face of the headstock aren't smooth and aligned properly. Read about tuner post alignment here.
If they're really stiff, and normal string tension doesn't take the play out of the gear, that is: there is slop in the function of the machines and they aren't behaving as they should, and they look bad and seem encrusted, it's time to do the big 100,000 mile overhaul. It's a step in the right direction, and it won't take long.
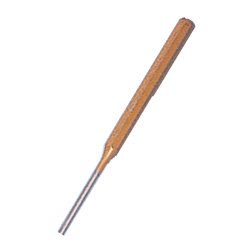
Hopefully you won't ever need to do this, but it happens sometimes: to get stuck cogs off the posts, you may need to use (or make) a tiny pin punch that will seat at the bottom of the screwhole inside the shaft but won't possibly touch or damage the threads. Here's a pin punch:
You can use a sacrificial drill bit of proper diameter as well. I'll repeat this because it's really important: you want to seat the punch way down on the bottom of the hole in the post without disturbing the threads in the walls!
Put the gear plate on a good vise whose jaws are closed almost to the diameter of the shaft, but not tightened to it. Just a hair loose. This way there is full support for the plate and the cog, but room is left for the shaft to drop through between the jaws of the vise. (A hole in a very hard block of wood would do as well.)
Put the pin punch down the screwhole until it touches bottom, and tap gently with a hammer. The gook holding it all together will give and the post will drop through, hopefully landing where you can find it again. Then you have the whole thing completely apart and can clean every bearing surface, so the cogs and posts all turn cleanly.
2) Clean the face of the cog that actually contacts the plate, and of course clean the plate too. Use an old toothbrush, a bunch of Q-Tips, paper towel, and patience. Several cleaning agents come to mind, naphtha (lighter fluid) being near the top of the list. Naphtha will dissolve the petro-derived plaque that creates quite a drag on the gear parts that should be able to make normal contact and slide smoothly. Get rid of it. You want everything clean and smooth, if not quite shiny.
Naphtha won't hurt the finish or the buttons. Or you, as it's not particularly toxic. It's sold as lighter fluid, but it's much cheaper at paint and hardware stores. It cuts the nasty stuff, wipes dry and leaves almost nothing behind, and what does get left behind, if you're worried about it (I'm not), can be cleaned with a typical water-based household cleaning agent, although it's not essential. I'm not sure what you'd find in your local store or under your kitchen sink, but Simple Green or 409 are two very good products.
Get the metal completely crust-free, then polish these surfaces with a good metal polish such as Flitz or Simichrome, if you wish. It's most important to simply get the surfaces clean and smooth.
Once the cogs and shafts are clean and dry and shined up, they'll slip right back together.
4) Clean the screws that hold the cogs on. Completely. And again, use a screwdriver on them that fits the slot precisely, so you don't booger it up. Nothing worse than a boogered screw slot, I say. The old American-made ones are a 4-36 thread, and you will not find this screw at any hardware store.
5) Clean the insides of the headstock bushings. Q-Tips work well for this. You want them clean and shiny inside. Do those in place, you don't need to remove them. Unless, of course, you want to do a number on the face of the headstock. Here's your chance to clean and polish everything.
So let's talk about lubricants.
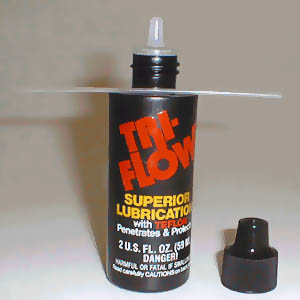
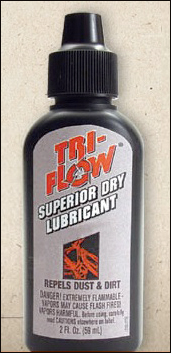
The one I use is called Tri-Flow. The ones in the first photos here are not their dry lube, but it's still very dry. By that I mean it contains just a bit of synthetic oil that won't polymerize into more of what you just cleaned out from under the cogs.
Oil attracts dust, it all congeals and attracts more crud, and pretty soon the gears are fouled again. Even this "wet" Tri-Flow lasts years and years with just one application. The Polytetrafluoroethylene, AKA PTFE (formerly known by it's trade name Teflon) does the real work. The carrier evaporates, leaving just microscopic balls of PTFE. Voilà, there's your lubricant.
Here's a vintage bottle:
Here's
what it looks like now:

Next, just to cover my bases, there's what
is known as dry lube available
at bike shops the world over, which I was told was
even better, because it contains the PTFE but no oil at all.
PTFE is the lubricant, it's a dry sphere too small to
see. It's in some kind of carrier which evaporates
completely. The "dry" stuff looks like this:
I came to discover it did not work well. Phooey, I went back to the so-called "wet" formula.
I also briefly used a similar dry lube called Finish Line and saw the entire bottle polymerize into the dreaded rubbery gook in a matter of a couple of months. Avoid this product, it's the same as the dry Tri-Flow, and it's not much good.
Whatever you do, do not use any common lubricants like WD-40, Three-In-One, sewing machine oil, 30-WT or any automotive oils, Caramba, or anything like them. Not Vaseline, nor rank-and-file greases, nor Mazola.
I greatly prefer the small bottles with the dripper tube, as the aerosol bottles are really hard to control. Percision application is what you want with small things like tuners.
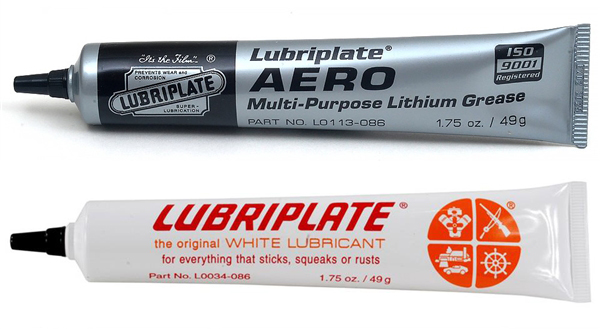
There is another lubricant worth mentioning: Lubriplate. I mostly use it for Klusons—gears sealed inside a housing, and for the rare case of a true sealed (rotomatic-type) gear that's gone dry. More about this on the other tuner maintenance page.
OK, we can consider the following to be basic tuner maintenance for any gear, as long as they're reasonably clean.
8) You need to tighten the screws that hold the cog just right. They need to be tight enough to hold things together, but loose enough to be able to yield to the pull of the string (taking out the slop or backlash) when it's at tension. If you overtighten it, the cog will bind on the plate, even if it's clean and polished and lubricated. This is the trouble many people have: they overtighten the screws so the cog is hanging up and there's no backlash movement in the gear. Don't do this! It must be able to move smoothly when up to tension. If a knob turns but the cog doesn't, this adjustment is wrong, or it's still dirty.
The best way to adjust the screw tension is with the instrument tuned up. Take your well-matched screwdriver and back the screw out a quarter turn, then turn it back in until it engages. Not until it's tight, just until it's firmly but gently set.
OK, it must be said: backlash (or slop, if you will) is good, it's necessary, it's unavoidable. Make it work for you by maintaining the gears. The string tension will pull against it and overcome it fully, if the gear is adjusted right.
When you install strings, or just to work the lubricant into an unstrung gear, use a string crank:
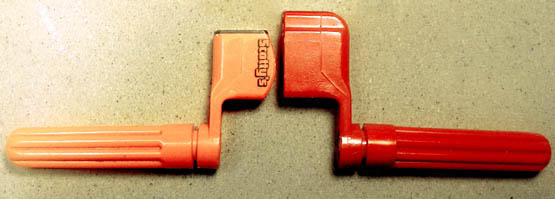
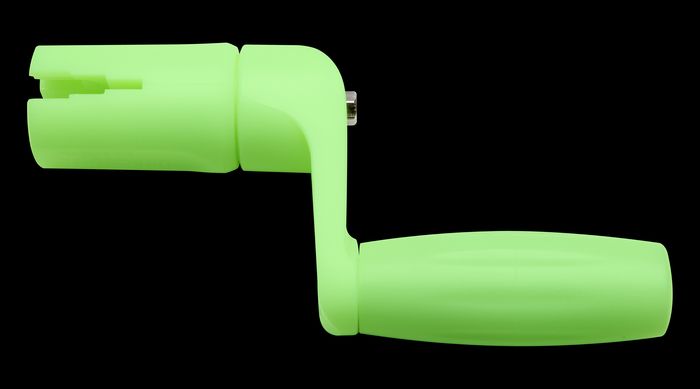
Here's one of my favorite shop tools, which I had to make:
These are also
available, in black and snappy glow-in-the-dark:
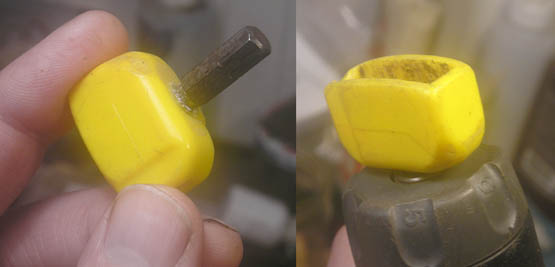
You can remove
the head and put that in your power screwdriver as
well. Brilliant.
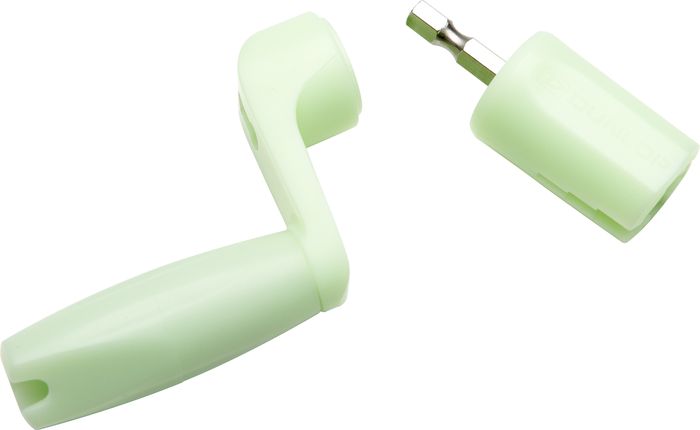
Mine's a standard little electric screwdriver, it takes a standard hex drywall bit which is elegantly bonded to a beheaded Scotty. This has been my standby for 25 years. Save your wrists! You can do a lot of turning with this, especially in a power drill!
If the bearing surfaces are clean, polished and well lubricated, and if the screw adjustment is correct, these gears will turn smoothly with no knob play under tension. The strings take up the backlash if they have been allowed to.
And it again goes without saying, but I'll say it again anyway, you always tune UP to a note. If your string is sharp, tune it down and then back up to the precise pitch. Right? Right.
And another thing: there are other structural issues with gears that will compromise their function that cannot be mitigated with lubrication or screw adjustment. If the gears are lubed and adjusted properly but are still difficult to turn, even without strings on, or if the gears turn well under no load, but seem to almost seize up as they get closer to pitch , the post spacing may be wrong relative to the spacing of the holes in the headstock.
Now that the plate is off the instrument and cleaned up and reassembled and lubed well, see how well they work. If the knobs all turn smoothly easily when they're under no load and not mounted, but stiffen up when they're on, that's an issue with alignment or tolerances.

More mandolin gear stuff such as mandolin gear direction here
Information about new and old Gotoh mandolin gears here
About tuner post alignment here.
My home page here and my main lutherie page here and my site map
What more could you want?

This page © 2002 -
2018 Paul Hostetter. All rights reserved.